Vacuum Forming
This is probably the easiest part in the whole process. It is also the most fun. This is where we will heat our sheets of polystyrene and form it over the molds that we have worked so hard on over the past few months.
|
Vacuum Forming This is probably the easiest part in the whole process. It is also the most fun. This is where we will heat our sheets of polystyrene and form it over the molds that we have worked so hard on over the past few months. |
Materials Needed: |
|
| Step 1 | Preheat your oven to 400 degrees | 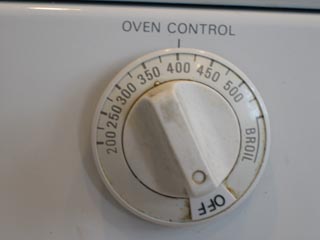 |
|
|
| Step 2 | Arrange your molds on your vacuum form table. They should be spaced out enough to allow the plastic to form around all sides of the molds. Don't put them too close to the edge of the table or you might not get a good pull. The edges of the plastic do not get as hot and soft as the center. You can also use small scrap pieces of wood to raise the molds off the table about 1/4 inch. This will eliminate the curve at the edges of the armor pieces. Placing the molds takes some trial and error, but after a few tries, you should be able to get the hang of it. | 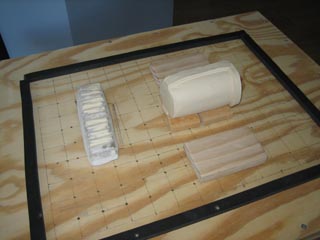 |
||
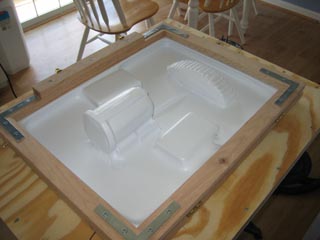
| Step 3 | Place a piece of polystyrene in you holding frame and place it in the oven. In about 5 minutes it should begin to soften. Once it droops below the frame a few inches, take it out of the oven and place it on your vacuum form table. Turn your Vacuum on and use the heat gun to soften up any edges. Using Gloves, massage the plastic into any detailed areas that look loose. The plastic will cool within about 20 seconds, so you don't have a lot of time. After about 30 seconds, turn off your vacuum |
 |
||
| Step 4 | Some Pieces will need a bit more work. Here is an example of the back piece that requires some modifications to form properly. Notice the raised circle and the raised area around the three shapes. Those two raised areas create an area where the vacuum will not be able to suck air from. |  |
||
| Step 5 | Look how the mold lost vacuum pressure inside of the raised area once the plastic sealed the area. To resolve this issue, we will need to allow air to be drawn from inside the raised areas. |
 |
||
| Step 6 | You will need a long drill bit to drill holes through the enclosed areas all the way through to the back of the mold. This will allow air to get pulled from the bottom and all the way through to these isolated areas. | 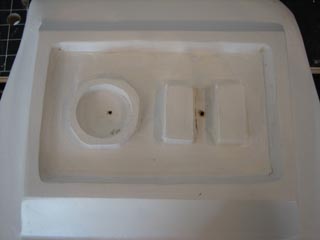 |
||
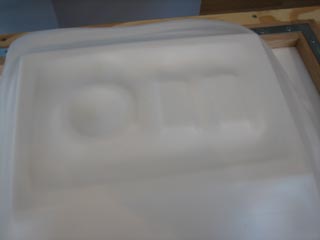
| Step 6 | Here is a picture of the plastic after it has been formed on the mold with the added air holes. Notice how much detail is exposed using this process. | 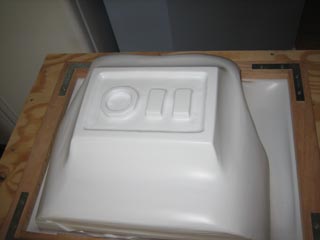 |
| |

Jim Connolly
jpconn1@gmail.com
Charlotte, NC